


Entries from Mountaineering Fitness & Training
Posted by:
Categories: Mountaineering Fitness & Training


Climbers heading to Rainier often ask the question, “water bottles or hydration system?” If you look around your local trail, chances are that most runners, hikers, and general recreationists are using a hydration system. Are these systems best suited to mountaineering, however?
In the past, many guides simply asked their climbers not to use hydration systems, but to carry water bottles instead. The belief was that the drawbacks of hydration systems outweighed the benefits. As hydration systems have improved to be less prone to leaking or punctures, this stance has shifted. There still are drawbacks to hydration systems, but given the right conditions, precautions, and expectations, they can be used effectively in mountaineering for a climb such as Rainier.
The main concerns we see with hydration systems are:
- The hoses freeze: During midsummer climbs with high freezing levels, this doesn’t tend to be as much of a problem. On cooler climbs, however, ice buildup in the hose can quickly block any water from getting through. The neoprene hose insulators are not particularly effective, and it doesn’t take much ice buildup to completely block the flow. Blowing the water back through the hose after every drink can help, but still isn’t 100% effective. The best practice is to bring an empty, water bottle (even if only ½ liter capacity) that you can pour the hydration bladder into should it freeze so that you still have access to water.
- Rationing water: Climbers can only carry so much water for a climb before the weight becomes cumbersome. Typically we recommend 2-3 liters of water for a Rainier summit day. This is plenty, but requires climbers to ration it; for example, 2 liters allows a climber 1/3 of a liter of water at each break. If climbers are sipping more consistently from a hydration system, often they lose track of that rationing, and find themselves partway into a climb, with no water left. Diligent attention is the only way to solve this, and this is difficult when you can’t actually see how much water you have left.
- Distractions: Trying to turn a hydration hose on and off and drink from it on the fly distracts from the climbing, the terrain, and the overall situation. When climbers are roped up and climbing, each member of the team is relying on all of the others to remain vigilant to catch a fall and to not cause a fall. A hydration hose is a distraction from this, and the solution is to either keep the hose tucked away inside the pack (where it is inaccessible) in climbing terrain, or for climbers to carefully assess the hazards of the terrain they are in at that moment, and to choose benign stretches to get their hydration.
Hard, plastic water bottles have been the standard in mountaineering for decades and still provide the simplest method of carrying water. They generally do not freeze, it’s easy to see how much you are drinking, and they are away in the pack while climbing. That being said, since they are tucked away in the pack, they are inaccessible and do not allow a climber the opportunity to get a quick sip of water on a long stretch. Hydration systems may have a place in your mountaineering kit, but practice with them, have a plan and know how to minimize the drawbacks. If in doubt, water bottles will still work fine!
_____
Questions? Comments? Share your thoughts here on the RMI Blog!
Posted by:
Categories: Mountaineering Fitness & Training

Lost in the noise of the next great exercise fad and short cut to greatness are truths that endurance coaches and athletes have known for about a century, gained through hundreds of thousands of hours of trial and error. An important one for mountaineers to remember is that there is no substitute for aerobic base training, gained through many hours of long, slow work. The aerobic base is the key to being able to maintain activity for hour after hour, climbing stretch upon stretch to the summit and descending safely back down. When the proportion of training is off and an athlete does too much high intensity training and not enough aerobic base training, the result is a condition coined by Dr. Phil Maffetone: Aerobic Deficiency Syndrome or ADS.
How does ADS manifest itself? These athletes may feel that they are at peak fitness. During their hardest workouts, they lift more, move faster, and break their own PRs, because of the focused high intensity work that they have been doing. When they make it to the climb however, they are surprised by how quickly their heart rate rises with a relatively slow pace. A few hours into the climb, they are running out of gas, they feel the lactate building up, and they can’t keep the pace. These athletes have a well trained anaerobic system, but their aerobic system is woefully lacking.
When we don’t train the long slow miles enough, we don’t stress the slow twitch muscle fibers, the backbone of endurance. Slow twitch fibers are responsible for a cascade of physiological events that lead to endurance performance: slow twitch fibers have a remarkable ability to oxidize fat into ATP, leading to energy without the buildup of lactate, and the mitochondria they contain can metabolize the lactate that results from oxidizing glycogen (carbohydrates). Even the leanest amongst us carries hundreds of hours of fuel in our bodies in the form of fat, and have the capability to go for incredibly long distances without fuel, provided that we stay in our aerobic zone. The question, then, is how best to optimize our aerobic system.
To build aerobic base capacity, the important piece is a large distance volume, done at zone 1 and 2. These workouts may not seem exciting, they certainly aren’t sexy, but as you accumulate those miles, the aerobic system's ability to do work increases and the base expands. Elite endurance athletes can build enormous aerobic bases, such that their aerobic threshold (the intensity at which they begin to accumulate lactate and start the countdown clock to a performance decrease) is incredibly high, perhaps only 10 or 15 beats per minute below their lactate threshold. The depth of their aerobic base allows them to do more work, for much longer, at a much higher intensity. It seems to run counter, but for these athletes, their speed comes from their long, slow training, not from intervals.
Including some intensity work helps to round out the training equation and reach maximum performance. With a well established aerobic base, some intensity training helps the body to optimize the systems that remove lactate, which is an endurance athlete's performance limiter. The amount of intensity training needed is generally far less than commonly assumed, however.
Remember that there are two main physiological systems for athletic performance, defined by metabolism: aerobic and anaerobic. Both can be trained, but in peak condition, optimizing one system comes at the expense of the other. For us in the mountains, chasing long summit days and lofty goals, the aerobic system is what we rely on.
_____
ADS, its causes, and its remedies are described well in the book Training for the Uphill Athlete, by Steve House, Scott Johnston, and Kilian Jornet. Also check out these articles from Uphill Athlete, and from the original describer of ADS, Dr. Phil Maffetone.
Questions? Comments? Share your thoughts here on the RMI Blog!
Hi Jeff,
Do not forget the downhill training. On Denali (or any sled based mountain adventure), not only do you need to drag a sled up the hill, you will need to be able to support a loaded sled dragging you DOWN the hill too. I ended up at the end (top) of the down hill line and realized that I did not train enough to support 600+ pounds of loaded sleds and rope mates. This was VERY hard on my knees; to the point where I decided, to my guide’s upset, that I would be better off descending backwards to prevent further knee injury (I had trained for, and achieved, SIGNIFICANT climbing strength and endurance).
Anyway. . . great article. From this experienced endurance athlete’s point of view, this is all great advice. I may have posted this before, but it might be prudent to consider how much oxygen is needed at altitude to process food in the gut. Bypassing the food during high altitude work and utilizing fat stores instead may help climbers realize their summit aspirations. Of course one does need to train for extended periods of internal-fat-stores only based energy supply. Perhaps an article would be beneficial?
I am definitely looking forward to more adventures with RMI now that the COVID lockdowns/restrictions era is beginning to show a light at the end of the tunnel. :-)
Posted by: Keith Loritz on 4/26/2021 at 2:46 pm
So what’s a good workout to combat this. I’m currently doing a five mile loop with a 65 pound pack and a 20 pound sled on dry ground once a week over glacial terrain. Takes about 2-2.5 hours no drink or food during. This is in conjunction with 3-6 mile daily runs and a stair day once or twice a week with the pack, 1000-1500ft so far.
-Jeff, Denali June 18
Posted by: Jeffrey Burkard on 4/25/2021 at 7:11 pm
Posted by:
Categories: Mountaineering Fitness & Training

There are several terms in training articles that get thrown around in confusing ways: aerobic threshold, lactate threshold, anaerobic threshold, aerobic capacity, VO2 Max, anaerobic capacity, and functional threshold power or pace. Many of these terms have definitions that are quite similar to each other, with minute differences that matter in the field of sports science, but are basically equivalent for athletes training. These terms all fit into three main categories that are important for us to understand as endurance athletes.
Aerobic threshold (AeT)
The aerobic threshold is defined as the intensity of exercise at which lactate levels in the blood begin to rise from their baseline. Lactate accumulation indicates that the metabolic pathways that are fueling our muscles with energy have begun to shift to a combination of aerobic and anaerobic mechanisms, and if the intensity that we are working at stays the same, or increases, lactate will continue to build. This is in effect an endurance limiter. Aerobic capacity is essentially the same term – it refers to the amount of work that can be performed before the athlete reaches their AeT.
Lactate Threshold (LT)
Lactate Threshold is the level of intensity at which lactate in the blood reaches 4 millimoles/liter. This is a tiny amount and is something that requires a blood test during exercise in a lab to determine. The more useful definition for athletes is that it is the intensity at which lactate production exceeds its removal. This is also the defining line above which, exercise can only be sustained at that intensity for short periods of time before fatigue and slowing set in. Consider this the upper-end limit to endurance. While the definitions are slightly different, this is essentially the same thing as Anaerobic Threshold (AnT) anaerobic capacity, and functional threshold. They all refer to the point at which the metabolic pathways switch to a primarily anaerobic pathway that burns glycogen (carbohydrates), and the ability to sustain that intensity will be limited.
VO2 Max
VO2 Max refers to the maximum amount of oxygen that the body can utilize for energy during an all-out effort that is well above their AnT. Theoretically, the better your body is at delivering oxygen to where it needs to go, and the better adapted your muscle cells are to exercise, the more oxygen they will be able to utilize to make ATP (energy) and the more energy they will have to do work. Sounds simple enough right? VO2 Max has been a big focus in endurance sports for a long time, partly because it is easily quantifiable. However, ask elite coaches, such as those at Uphill Athlete, and they will tell you that VO2 Max doesn’t correlate very well to performance, and seems largely determined by genetics. Athletes for decades spent considerable effort training to increase their VO2 max, but recent studies suggest that that time would be better spent increasing the aerobic threshold.
Why do these terms matter? One dispels a popular myth related to training (VO2 Max), while the other two are the categories where we as athletes have the greatest abilities to affect our metabolic and motor pathways to achieve better performance. The balance of aerobic threshold and lactate threshold training that we do as we prepare for a large climb will determine how we perform. We’ll be diving into these two topics in more depth in the coming weeks so stay tuned!
_____
There are several great resources that provide a lot more information on these topics. For this article, we pulled from Joe Friel’s blog and from the recent book, Training for the Uphill Athlete, from the folks at Uphill Athlete. We can’t recommend the book enough if you are serious about training for endurance mountain sports!
Comments? Questions? Share your thoughts here in the comments!
Posted by:
Categories: Mountaineering Fitness & Training

One of the keys to performance in endurance events such as distance running, cycling, swimming, or mountaineering, is to be able to put in a hard burst in the middle of your effort and then recover. We see Tour de France cyclists do this all the time, racing a full out sprint in the middle of a stage, then recovering for the final sprint 60 miles later. Runners do it when they make a break up a hill to get away from the field, and mountaineers need to be able to do it when getting through a tough stretch of Disappointment Cleaver or clambering over the bergschrund on the fixed lines on Denali. The ability to put on a burst AND recover while you maintain your activity is developed through interval training.
There are lots of different intervals that can be tailored to accomplish different goals, from natural rolling intervals (Fartlek Intervals), to the 4x4 interval workout. Another useful set of intervals are ladder intervals.
Ladder intervals are sets of increasing and/or decreasing intervals. Ladder intervals can be done in a variety of terrain, from flats, to rolling hills, to a hill climb. A common ladder set might be to do a 1-minute interval, then recover, then do a 2-minute interval, followed by a 4-minute effort, followed by a 6-minute interval. Once you reach your peak (you’ve worked your way up the ladder), start working your way back down, reversing the pattern. After the 6-minute interval, do a 4-minute interval, then a 2-minute interval, and then finish with a last 1-minute interval. As with all interval training, the goal is to complete each one at a similar pace. The 1-minute interval might naturally be a bit faster, but you want to avoid blowing yourself out in the first couple of intervals so that you are just surviving through the remainder.
Another important component to interval training is the recovery time. Recover for between 50-100 percent of the duration of the previous effort. For shorter intervals, recovery time might be closer to 100 percent (you might recover for 1 minute after a 1-minute interval) while longer intervals may be closer to 50 percent (for the 4 and 6-minute intervals). Recover for long enough that your heart rate has dropped and you feel ready for the next set, but not so long that your heart rate returns to a very low zone 1 or 2 effort level. Recovery is best accomplished actively, at a very slow jog, walk, or spin; after all, the ability to recover while moving is what we are trying to develop.
As with all training tools, the ladder intervals can be adjusted to fit your needs. Using longer sets (at a slower pace) will help to build your lactate threshold, while shorter (and faster) sets will help to build your anaerobic threshold and recovery. These can also be done over distances rather than time, such as on a track. An example might be a 100m, 200m, 400m, 800m, 400m, 200m, 100m. Remember that interval training requires a quality warm up and cool down, both to prevent injury, and allow you to perform and get the most out of the workout.
_____
Need a refresher on interval training? Learn more about general interval training…
Questions? Comments? Share your thoughts here!
very impressive post for mountain climber like me.i am very excited to do my next expedition after reading your article.
Thanks for sharing.
Posted by: Rajendra Timalsina on 5/14/2019 at 8:18 am
Posted by:
Categories: Mountaineering Fitness & Training

High Intensity Interval Training, often referred to popularly as HIIT training, have been featured in a few recent studies that concluded that a short HIIT workout was as or more effective at promoting cardiovascular health than steady state activity. The first paragraph of a recent New York Times article reads:
Think you’re too busy to work out? We have the workout for you. In minutes, high-intensity interval training (HIIT) will have you sweating, breathing hard and maximizing the health benefits of exercise without the time commitment. Best of all, it’s scientifically proven to work.
Despite the recent attention, interval training is not anything new to seasoned athletes and coaches who have understood the benefits of repetitive high intensity workouts for a long time. Many of the recent studies have focused on previously sedentary people trying to improve basic cardiovascular health, rather than on elite athletes striving towards a performance goal. With that said, we have and continue to encourage climbers to utilize interval training (by it’s nature high intensity) as part of a well-designed training program.
Interval training can accomplish a wide array of tasks and works best when the focus of a workout is clear:
Longer intervals, from 5 to 8 minutes, at 70 – 85% of max heart rate work to improve the lactate threshold, the body’s ability to metabolize and clear lactate build up from muscle cells, increasing the amount of work that the body can perform sustainably. A good example is an elite level marathon runner, who is able to sub six-minute miles for over two hours during a race. The intensity that they are working at is very high, yet the body is able to sustain it over a very prolonged period of time.
Shorter intervals, from 20 seconds to a few minutes, performed at 85 – 95% of max heart rate (very intense!) increase the body’s anaerobic threshold, it’s ability to perform work while in oxygen deficit. Think Olympic swimmer in the 50-meter butterfly: the intensity that they race at surpasses the body’s ability to clear lactic acid and to provide enough oxygen to the muscle cells for them to continue that pace for a long period of time. The race is very short, however, and for that 20-something seconds, their muscles are able to put out an immense amount of power in oxygen deficit.
It may seem as though interval training isn’t as applicable to our sport of mountaineering. We tend not to sustain the very high levels of output, but instead operate for far longer periods at moderate intensity. It is the very definition of an endurance sport. Interval training provides other physiological adaptations however that go beyond the abilities of the skeletal muscles. Interval training is shown to increase cardiac output, by increasing the size of the left ventricle, the stroke volume and the overall contractility of the heart. Increased cardiac output supplies more blood to muscle cells, delivering more oxygen and removing more waste. Additionally, interval training has been shown to increase the size and density of mitochondria in the muscle cells. Mitochondria use oxygen to convert glucose to ATP (the cells’ energy source). Both of these adaptations help endurance athletes go longer, faster and with less effort, and ultimately help us in the mountains.
Interval training is harder on your body than traditional steady state workouts and requires longer to recover from as well. Therefore, too heavy of a focus on interval training can lead to overtraining and injury. More of a good thing isn’t necessarily better. It’s important to realize that a good training plan maintains a balance of high intensity workouts and lower intensity steady state workouts.
As part of the recent HIIT hype, people have championed the fact that HIIT gets more done in less time, even as little as 10 minutes. This may be true for an average person whose goal is to improve overall cardiac health, but for athletes working towards goals in the mountains, remember that there are no short cuts. Time invested in your training will lead to a more enjoyable and successful climb.
_____
Questions? Comments? Share your thoughts here!
Fantastic insights on integrating HIIT into rock climbing training! Your clear explanations make it effortless for novices like me to recognize the benefits. Thank you!
Posted by: Musclegaragefitness on 12/29/2023 at 4:15 am
Incorporating HIIT into mountain climbing education is a game-changer! Your insights supply a realistic method to elevating health for difficult terrains. Thanks for the treasured guidance!
Posted by: Rejesh raj on 12/18/2023 at 1:29 am
Posted by:
Categories: Mountaineering Fitness & Training

When training for any sport, the best training advice is that you need to “do the sport.” If you are training to run a 5k race, you should spend a significant amount of your training running. 24 hour mountain bike race? You are going to spend a lot of training time on a bike. Crossfit competition? You’d better flip a lot of tires, do a lot of burpees, and swing a lot of ropes. So what do we do when our chosen sport is mountaineering?
For the lucky amongst us, we have mountains and hills nearby. We can lace up a pair of boots, put on a weighted pack, and head out the door for a several hour hike. So many of our climbers don’t have the luxury of living nearby mountains (for many, not even many hills), yet so much of our training advice relies on gaining vertical elevation throughout the workout. For flatlanders, one of the best options to still achieve vertical distance during a workout is to use a treadmill set at its max incline.
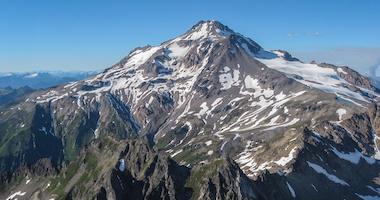
On Mt. Rainier we aim to climb at a pace of about 1000 ft/hour. We use this measure because our pace varies with the terrain. In flatter terrain with less rise per step, we’ll up the tempo and move a bit faster. As the terrain gets steeper and the effort increases, we back the speed down somewhat, all in an effort to continue to move efficiently. 1000 ft/hour, therefore, is a useful benchmark in your training.
A treadmill typically has a max incline of 15%. To climb 1000ft. on a treadmill therefore, you need to walk roughly 1.25 miles of horizontal distance (what the treadmill measures). Setting the pace to 1.25 miles per hour on the treadmill will approximate the pace of the climb, at least on paper.
There is a physics argument around frame of reference that argues that a treadmill should be the same effort as hiking outside (the same argument is made for stairmasters), however, physiological studies show that heart rate and oxygen consumption (a way to measure effort) are lower on a treadmill for the same pace on solid ground. This suggests that a treadmill then requires somewhat less effort and is in effect easier. How much easier? This is a difficult question, that doesn’t have an answer. With this knowledge, we can simply set our pace to be faster than 1.25 miles per hour and increase the difficulty through speed. If we increase the difficulty enough, we will approach the difficulty of the climb.
Other great options for tailoring your training to the vertical gain involved in climbing include stadium or office building stairs. In this case, you are moving your center of mass uphill, just like in mountaineering, so 1000 ft/hour will feel similar to the actual effort. Embrace the options that are available to you, grab a pack and some weight, and see how much vertical you can incorporate into your training!
_____
Comments? Questions? Share your thoughts here on the RMI Blog!
Hi, looking into training and wanted to get a treadmill at home. The ones that dont take up an outrageous amount of space (and $) really only go to 10% incline. I wanted one at home so i can get used to walking for longer durations. Is 10% still good enough for training if supplemented with stairs/gym, outdoors, etc? I also have a weighted vest that I would incorporate and make heavier over time. Thanks!
Posted by: sab on 10/8/2025 at 12:29 pm
Hi. I have an inclined NordicTrack treadmill that goes up to 40% incline. It just doesnt feel like its 40% because I can do 2 miles an hour at this from 20% to 40% climbing about 3000 miles and i am tired but not “dying”- like at different climbs. Any suggestions?
Posted by: Mo on 12/12/2024 at 8:07 am
Posted by:
Categories: Mountaineering Fitness & Training

One of the unique aspects of a Denali climb is that it is one of the few big mountain climbs in the world where you can’t hire someone to carry some of your gear. There are no porters, donkeys, yaks, or other pack animals. This means that once the plane drops us off at Kahiltna Base Camp at 7,600’, we have to find a way to move three weeks worth of expedition provisions and our gear up the glacier, and this necessitates each climber pulling a sled.
The use of sleds is unique to Denali and Vinson Massif, and is a component of the expedition that we often overlook when we are preparing. On Denali, we typically use sleds to 11,000’, or for the first 3-4 days. While this is a small component of the expedition, those first few days can leave climbers feeling exhausted and depleted, with the bulk of the climb still to come. Spending some time training with a sled in the lead up to an expedition could help ease this.
On the mountain, we use plastic expedition sleds, not unlike a kid’s sled that you might find at a hardware store, but with a bit more length for added volume and stability. A typical climber has between 40 and 50 pounds in their sled at the outset, and we rig the front of the sled with a trace that clips to a single loop of webbing tied around the climbers backpack, preferably threading through the slot that houses the hip belt, so that the load pulls from low on the pack, about even with the hip belt. This transmits the climber’s pull most efficiently, and keeps the climber in a more efficient alignment, pulling from the center of mass.
To prepare for sleds, try pulling a mock sled during a handful of your endurance workouts (over an hour or so) in the few months leading up to the expedition. Climbing with the sled behind you not only recruits different muscles and requires strength in different areas than climbing without, but requires that we alter some of our movement patterns a bit to remain efficient. The biggest pattern to change is the bread and butter of the mountaineer: the rest step. Efficient movement with a sled involves keeping the sled moving forward steadily. Each time it stops, we have to overcome inertia to get it moving forward again. Therefore, we want to keep our hips moving forward steadily (which is a change from the rest step). We can still get some rest in our legs with each step, by locking out the back leg as we step forward, moving that leg under our hips. Using the resistance of the sled for balance, we can allow our hips to slowly travel over our back leg toward the front, while still maintaining the moment of rest on the back leg. As the hips arrive over the front leg, step up and repeat.
Climbers have found a number of sled type devices to train with; the two most common are a car tire and a plastic sled loaded with some sort of weight (even the kids!). Plastic sleds slide on grass pretty well, while the car tire doesn’t slide as well and tends to add more resistance. Using the mock sled during some of your endurance workouts is most similar to what we’ll experience while climbing, but pulling a sled during an interval workout is also a creative way to add resistance and effort. Happy hauling!
_____
Questions? Comments? Share your thoughts here on the RMI blog!
Unless you are properly prepared, the downhill slid experience, for the return to home segment, will be difficult and potentially very dangerous. The loaded sled, and any roped team members in front of you, will be pulling you downhill. Completely different muscle groups will be employed to resist “the fall” downhill. I would suggest thinking about training for this reverse pull by turning around 180 degrees on clear and safe portions of your ladened uphill training.
Posted by: Keith Loritz on 3/20/2023 at 6:28 am
Posted by: Mike King
Categories: Mountaineering Fitness & Training

As climbers we need to travel safely through complex and hazardous terrain to reach the day’s objective and ultimately return to the car so that we can share our mountain experiences. As Guides we have 3 specific expectations of the people we rope up with:
- Keep the pace of the guide
- Climb in balance
- Take care of yourself at breaks
Climbing in balance will help you manage the other two expectations. By climbing in balance you will move through the mountains more efficiently and be less fatigued so that you can re-fuel and manage your layering at the breaks. Balance can be developed and improved through a variety of training regimens, and incorporating agility training is a great way to improve your balance while climbing.
Wikipedia defines agility as
- the ability to change the body's position efficiently and requires the integration of isolated movement skills using a combination of balance, coordination, speed, reflexes, strength, and endurance. Agility is the ability to change the direction of the body in an efficient and effective manner and to achieve this requires a combination of:
- • balance – the ability to maintain equilibrium when stationary or moving (i.e. not to fall over) through the coordinated actions of our sensory functions
- • static balance – the ability to retain the center of mass above the base of support in a stationary position;
- • dynamic balance – the ability to maintain balance with body movement; speed - the ability to move all or part of the body quickly; strength - the ability of a muscle or muscle group to overcome a resistance; and lastly,
- • co-ordination – the ability to control the movement of the body in co-operation with the body's sensory functions.
Mt. Rainier’s Disappointment Cleaver route tests a climber’s agility while climbing the rock ridge that divides the Ingraham and Emmons glaciers, aptly called the Disappointment Cleaver. In the spring months the route up the Cleaver is comprised of steep snow and by mid-summer is entirely rock. Regardless of the conditions, this section of the climb is more physically taxing for climbers who haven’t developed solid agility skills, as the Cleaver involves large steps, difficult footwork on loose snow or scree and 1,200 feet of elevation gain, so the ability to climb it in balance and as efficiently as possible is a must.
How to train agility:
Get off the pavement! Much of your balance and agility is achieved by small stabilizer muscles in your feet, ankles, knees, hips, and core. Running over roots, rocks, and uneven terrain will help you develop your agility by causing these muscles to fire more often and in different combinations as they adapt to the terrain changes of each step. Cross-country and alpine skiing, hiking, and yoga can all help to build these same stabilizer muscles and can be a tool if running isn’t possible for you. Off-road activities also help train you to look ahead to anticipate the irregularities of the trail. This will aid you when you climb so that you focus on what is ahead of you and don't get stuck on what is directly at your feet.
An agility ladder is a great tool for home workouts and will help your dynamic balance and coordination. If you do not want to purchase a ladder, draw one with sidewalk chalk on your driveway. There are a multitude of potential exercises you can use with a ladder, to build quick footwork, reflexes, and agility. Start with these and build your repertoire as you see fit!
Remember, if you're not having some fun while training then you will likely find an excuse to just go through the motions or not train. Get after it and I look forward to seeing you out in the hills!
Useful agility ladder drills: https://www.youtube.com/watch?v=oxjC-0yuSHM
_____
Mike King is a senior guide with RMI Expeditions and a Wilderness Medicine Instructor for WMI of NOLS. Mike guides around the world for RMI. Some of his favorites are upcoming trips to Machu Picchu, Aconcagua, and Mexico's Volcanoes.
Questions? Comments? Share your thoughts here on the RMI Blog!
Rich - We totally agree. Thanks adding even more context to agility training!
Posted by: Pete Van Deventer (Guide) on 2/22/2019 at 12:05 pm
I find training agility to be an excellent adjunct to the monotony of steady aerobic training. With the right parameters, it can be used as aerobic or interval training. In addition, breaking down the components used in developing agility such as the feet, knees, hips and trunk can greatly enhance the results. For example, if the feet are limited in pronation or supination, it can greatly limit the strength capabilities of the muscles of the knees, hips and trunk. When both feet have optimal strength in all motions, then power increases and fatigue decreases. Training to climb mountains is challenging, but it leads to great rewards when the body is in fantastic condition.
Posted by: Rich Rife on 2/21/2019 at 11:59 am
Posted by:
Categories: Mountaineering Fitness & Training

I’m glad somebody finally realized that actual stairs need to be done, not just walking on a Stairmaster since it doesn’t reproduce the motion of lifting one’s whole body against the gravity exerted by Earth, just the legs. But while I’m on legs, think of adding ankle weights to this workout to simulate the weight of boots/socks/gaiters/crampons/whatever else you’ll have on your feet.
Posted by: Jim Pasterczyk on 3/4/2019 at 10:00 pm
Thanks for these comments from the two re: climbing Mt. Rainier!! I have done hot yoga for a few years, awesome to hear it will be helpful :-) It helps and enhances EVERYTHING; so…great news re: that. I do have a question re: Ady saying “throw weight in your pack now”. I am JUST getting started on working on my leg and back muscles to strengthen them…I have questions re: do I go rent/buy a pack now (was planning on renting one for the hike), or? I have heard another good way to train is a weighted vest…Anyway..a little feedback re: the rationale of throwing weight in a day pack now…I don’t think it would be distributed evenly, etc. I have NEVER backpacked; and honestly carry any weight when bike riding on paniers/ NOT on my back if I can help it..thanks!
Posted by: Shelby Schneider on 10/1/2018 at 5:14 pm
Posted by: Geoff Schellens
Categories: Mountaineering Fitness & Training

Thanks for this. Definitely want to start implementing some of the techniques you mentioned. Applicable for more than ice-climbing!
Chelsea | http://www.nootropedia.com
Posted by: Chelsea on 4/1/2018 at 3:50 pm
I will be 66 this May. I am active mountain biking regularly am not overweight but live in New Jersey.
I’m a sea level baby. A few years ago about 5 or 6 my brother-in-law who has summered Rainier dozens of times even Denali without oxygen took me up the mountain. Within sight of Muir after sleeping around 9000 feet the next morning carrying my heavy pack I just ran out of gas.
I want to Summit Rainier.
This year I am very busy with trips but want to do it in 2019.
How should I approach this.
I want to use RMI.
Posted by: Norm Price on 1/8/2018 at 6:05 am


Please tell me what type of bottle for mountaineers is used what you should think about a water bottle which have everything you need what type of water bottle is good what thing you think will there in water bottle. I am designing a water bottle
Posted by: Tanisha on 5/30/2023 at 9:00 am
I use a bladder in winter here in the north east and have done so for years. Just have to be mindful to mitigate freezing.
I spend up to multiple weeks solo on snowshoes and it gets pretty cold out here.
We had a week straight where temps hovered in the mid -20s °F last season.
I was on trail and had no problems.
My hydrations sleeve is lined with reflection film(did that myself) and I fill the bladder with warm water on cold slogs.
This is not the pack sleeve that is lined but the separate sleeve that came with my Camelbak.
As long as you blow the line out it works fine.
My sleeve that runs on the feed line is modified as well.
A bit is also dependent upon how the bite valve is set up.
Also, the being able to see what is in your nalgene is out of the proverbial window to a large degree if you utilize and insulated sleeve on your 1L(ie OR/Nalgene.)
Granted you can look down into the bottle but its still a crap shoot unless you take the bottle out of the sleeve and look or try to line the water lever with your finger on the outside of the bottle.
I can see the whole distraction thing while on the move but if your stagnant in a congo line you cant take a sip out of a bottle without dropping your pack to get to the bottle being you dont know how long you will be static.
With a hydration system this is a non factor.
There are pros and cons to both approaches as with anything.
Posted by: Loco Raindrops on 8/13/2019 at 9:58 am
View All Comments