


Most Popular Entries
Posted by: Mike King
Categories: Expedition Dispatches Torres del Paine


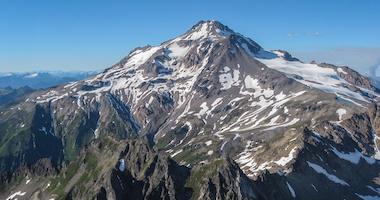
The Team got started from Refugio Paine Grande at 9:30. The weather was cool and windy for the first two hours as we hiked to Campamento Italiano at the base of the French Valley. We ditched packs and grabbed a light lunch and water, then headed up to the British viewpoint. The views of the Horns, Sharks Fin, and surrounding peaks were worth the side hike. A quick descent down to grab packs and a 30-minute walk to the French Domes wrapped up the day. The skies have been grey and the rain has held off until after getting to camp each day so fingers crossed for two more days of hiking.
Posted by: Joe Horiskey
Categories: Guide News


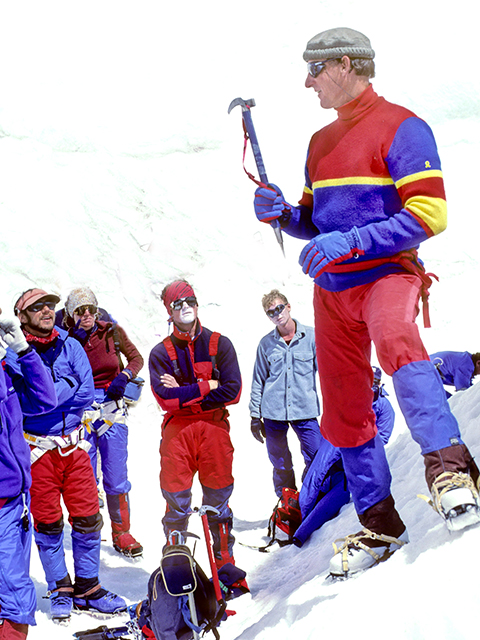
Thanks for the fine recap, Joe. Wish I could have been there for the celebration of Gombu’s life. He was a giant. My hero and my friend.
Posted by: Dave Hahn on 6/7/2012 at 6:39 am
I have such great memories of climbing and travelling with Gombu. Whether on Rainier or on the way to Kanchenjunga and Chomolari, Gombu always had the right words to help the slower travelers and to deal with the task at hand. I especially remember his families kindness and generosity when they hosted a traditional Tibetan wedding for Heidi Pletz at Sita and Gombu’s home in Darjeeling. All the great work he did with the Himalayan Mountaineering Institute will be long remembered along with all the climbs and guiding.
Posted by: Keith Roush on 6/6/2012 at 7:47 am

We enjoyed a rainy rest day at Refugio Grey. The wind and water on Lago Grey didn’t cooperate for a kayak tour but the time off our feet was appreciated. With only 7 km to Paine Grande we got a later start and walked through the 2011 forest fire scar that provided great views due to reduced vegetation. The trail took us up and down a section of rocky bluffs filled with foxglove and tall grass over 4.5 hours. The winds are usually strong in this section and today was no different. Arriving at Refugio Paine Grande we got glimpses of the main rock formations this area is famous for. High winds, snow and grey skies up high made from some good spectating from within the beautiful and modern hut. Three days remain and we still have a lot of trail to cover and mountains to see. Thanks for following along.
Posted by:
Categories:

By Geoff Schellens
Climbing big mountains is all about cardio, endurance, and strong legs, right? Wrong. While these are important areas to focus on during training, our core is easily overlooked. Our core connects our upper and lower body and is a vital part of stabilization when climbing. Carrying heavy packs on our backs, moving through uneven terrain, avoiding injury and maximizing efficiency are just a few examples of the need for a strong core. Below are five exercises for climbers that encompass our entire core: specifically the transversus abdominus (the cylinder providing stability) not just our rectus abdominus (that sexy six pack). Do these exercises slowly and with proper technique; please don’t risk injury forcing another rep. I recommend doing this routine two to three times a week and bumping up to four to five times a week after a month or more.
First, identify your core muscles and engage these. Lie down on your back and place your fingers 1 inch from the rim of your pelvic bone in towards your center. Push those muscles upwards. Those are your stabilizing core muscles.
Plank and Side Plank: Hold a push-up position with toes on the ground, legs together or shoulder-width apart, and hands on the floor directly under your shoulders. Engage your core and hold it. It is called “plank” for a reason; don’t let your back or hips droop or your butt rise up. At some point you will probably start shaking and it will become exponentially more difficult: hold it just a little longer. I keep a stopwatch on the floor in front of my face and try to hold the plank position 10 seconds longer each time. Keep your face relaxed with calm breathing. You can build up to forearm plank (instead of on your hands). Side plank is the same but rotate your body 90 degrees so you are facing the wall (or mirror). Remain lifted on one straight arm and the outside of the same foot. Keep your hips high: most likely you will droop towards the floor. If at first it is too difficult to keep your hips up with your legs straight, bend to your knee the leg closest to the floor. Don’t forget to get both sides.
Wood Chop: This is a great one for strengthening many of the smaller muscles in your core including some in the lower back. Start with a small weight (i.e. a full Nalgene water bottle), you can add weight later after you build technique. Stand with your feet shoulder-width apart and the weight about six inches to the left of your left foot. In a controlled movement, lift the weight with both hands across your body ending with out-stretched arms high above your right shoulder. Control the weight back to the starting point and repeat. I go for 25 reps on each side and add weight after a few weeks.
Russian Twist: Sit on your butt with knees bent, feet hovering a few inches off the ground, and a straight back angled slightly away from your knees. Again start with a light weight and add more later. Hold your weight, a Nalgene or a small medicine ball, with both hands and in a controlled movement twist your torso to touch the weight to the floor on your left side then slowly twist to touch the weight to the floor on your right side. Start with reps of 25 and go from there.
Toe Touches: Lie on your back. With your legs together, lift them straight up, feet flat as if trying to stand on the ceiling. Take your two peace sign fingers together and cross your left fingers to the outside of your right foot. Come back to center, then cross your right fingers to the outside of your left foot. Keep moving back and forth with control. Start with 15 reps/side. The goal is to keep your shoulders off the floor and your legs & feet stationary.
Bicycle: Start with your back flat on the ground knees at 90 degrees above your hips and feet in the air. Your hands will be behind your head with elbows pointing to the sides. Extend your left leg out so the foot is about six inches off the ground and bring your left elbow to your right knee. Again don’t strain yourself: this is a slow and controlled, twisting crunch. Now bicycle your right foot out and bring your left knee up as you crunch your right elbow to this knee. The goal is to bring your elbow to your knee (not vice versa). Start with 20 reps and add more as you go.
These are five of my favorite core exercises that are easy to do anywhere. Hope you enjoy!
_____
Geoff Schellens is a senior guide for RMI Expeditions, guiding trips around the world. He has extensive experience on Mt. Rainier, in Alaska, the Himalaya, and Antarctica. Geoff is also an AMGA certified Rock Guide. He lives in Bozeman, MT.

We got a casual start from Lago Dickson this morning around 11:15. The hike was about 5.5 hours and the Los Perros camp is in a colder and more humid area. So instead of rushing there we hung out this morning. The hike took us mostly through a dense forest and along side some beautiful glacial rivers with narrow canyons and a nice waterfall view at lunch. Shortly afterwards we began climbing a lateral moraine and got some nice views of the Perros glacier and surrounding peaks. There has not been much direct sunlight this trip and there also has not been much rain. The overcast skies have not made for the best pictures but the temperatures are good for hiking and everyone is enjoying the beautiful scenery.
Tomorrow we head up through John Gardner Pass, the highest point of the trek at 1200 meters.
Posted by: Nick Scott, Dominic Cifelli
Categories: Expedition Dispatches Aconcagua
Elevation: 19,600'


After many days of carrying loads up hill, we are finally at high camp, poised to make an attempt on the summit. Tonight will be our first of two nights spent at 19,600 feet, but it is unlikely many of us will sleep tonight. This will be due as much to nerves and apprehension as to the altitude. Regardless of whether sleep comes tonight, we will all rise early and begin the slow, steady march towards the top of Aconcagua at 22,842 feet early tomorrow morning, before the first light of dawn is on the horizon. It seems the mountain and weather gods have seen fit to push the worst of the winds farther out into the forecast, lucky for us. It will still be cold and it will still be hard, but this group of climbers just might have the right amount of grit to pull it off.
On The Map
Wishing you a successful day.
Prayers to the winds to take a break on you all.
Mr. C. is watching.
Posted by: Pat on 2/3/2020 at 9:19 am
Thinking of you all today as you push for the summit! Good luck and happy, safe hiking! Hoping for a successful climb for this crew.
Posted by: Marlana D on 2/3/2020 at 4:18 am
-(P3).JPG)
Yesterday was a day that the Team won’t forget for some time. We got a 5:30 am wake up to pack while rain showered down on our tents at Perros Camp. By the time we set off uphill at 7:10 the rain had tapered off but the muddy trail would remain for the next few hours. The group weaved its way through roots and rocks trying to stay out of the calf deep mud.
As we got above tree line the sun had started to illuminate the fresh snow covered peaks above. The clouds stayed high allowing great views of the days previous terrain and the many glaciers surrounding John Gartner Pass. The 1968’ of elevation to the pass consisted of rock trails and snow melt streams. Arriving in the pass at 3840’ the warm up was over and the day’s work was just beginning.
The first part of the descent from the pass was 2,560’ straight down. The trail, if you could call it that is best summed up as a cruel game of chutes and ladders. People use the roots, rocks, trees, ropes and black iron plumbing pipe as handrails. Picking your way down and being cautious to not trip or tumble. With tired legs and a bit of mental fatigue we pulled into Paso Camp.
From Paso Camp at 1280’ we hadmore chutes and ladders terrain that eventually dropped us to Refugio Grey at 500’. To get there we had three impressive suspension bridges that spanned 300’ deep canyons. Along the way we enjoyed spectacular views of the Grey glacier which is one of the arms making up the Southern Patagonia ice sheet. We didn’t all get to camp at the same time, but arrived safe nonetheless to a hot dinner, drinks, showers and a comfy bed.
Aside from sore feet, knees and a few blisters the Team is doing well and enjoying a rainy rest day at Refugio Grey. Boat repairs are keeping us from a Grey glacier tour but there is hope for a kayak tour later this afternoon if the wind dies down.
Apologies for the delay in dispatches, we had poor signal at our last camp and yesterday were busy experiencing this adventure and tough day to concern ourselves with the internet. A huge shout out to Fernando and Francisca our Chilean guides for their professionalism, local knowledge and camaraderie during this trip so far.
Posted by: Nick Scott, Dominic Cifelli
Categories: Expedition Dispatches Aconcagua
Elevation: 18,000'

Due to an unfavorable weather forecast we have made the decision to alter our regular schedule. Instead of carrying to Camp 3 today, the guide team decided to rest at Camp 2 and move up to High Camp tomorrow. This advances our itinerary by one day and pushes up our summit attempt to Monday the 3rd. After carefully studying the weather and consulting with the locals who know Aconcagua’s weather patterns best, the guides and climbers believe that this decision provides us with our best window for a summit attempt. Everyone is feeling strong and has been acclimatizing well. We will give it our best efforts and hope that the winds hold off just long enough to make it to the top.
On The Map
Posted by: Nick Scott, Dominic Cifelli
Categories: Expedition Dispatches Aconcagua
Elevation: 13,800'

After many days of walking uphill, we finally turned ourselves downward towards basecamp. The mountain however, did not seemed pleased about our decision. We woke up this morning to raging winds that made taking down the tents and packing for the descent more of a chore than necessary. It seems the storm we were avoiding by advancing our itinerary had arrived. The winds howled at our backs the entire way back to basecamp. Despite the trouble from the weather, we made the trip back to the comforts of Plaza Argentina. A trip that took eight days to go up, we completed in just seven hours on the way down. Everyone was happy to be back in solid structures where the wind couldn’t bother us and to have ample oxygen to fill our lungs with. Just two more days and we will be back in Mendoza. We are so close to civilization we can taste it!
On The Map
Posted by: Dave Hahn, JJ Justman, Billy Nugent, Mark Tucker
Categories: Expedition Dispatches Everest
Elevation: 17,575'

RMI guides make great decisions. Dave, Billy, JJ. This is why I’ve climbed a number of summits with RMI—you literally are trusting them with your life to make good decisions.
While I’m sure this was an extremely difficult decision, I believe it was the right one. Sometimes you have to listen to what the mountain (and circumstances) are telling you.
Safe travels home.
Posted by: Dan on 4/25/2014 at 7:38 am
So sorry for the loss and for the tough situation it put you all. I’m glad you are safe and coming home. JJ—you’ll have many, many more climbs….
Posted by: Randy Christofferson on 4/25/2014 at 5:23 am


Hi guys, I had sent a previous message but I don’t think it got through so I will try again. Anyway, this trip sounds like my kind of trip. I’m sure you all are having a great great time. I’m sure you all, by this time, would love a hot meal, A hot shower and a dry bed to sleep in. I’m sure, by this time, Katie will be having withdrawal symptoms from Trader Joe’s and Bloomingdale’s. See you all soon and don’t forget to smell the flowers.
Posted by: Marilyn Freedman on 2/19/2020 at 10:39 am
Hey guys…I’m following you on this blog site. Photos look great. Happy Birthday Michael! Bruce, I hope your foot feels better, and Katie and Matt, hang in there…. Dinner at Arlington Kebob awaits your return!
You’re not missing anything here. Sofar, the US seems to have contained the Coronavirus, Trump is still president, and with the stock market hitting new highs, you have enough money to sign up for another RMI expedition! Have fun.
Posted by: Joyce Freedman on 2/17/2020 at 8:04 pm
View All Comments