Hello from the Plantation Lodge,
The Ngorongoro Crater did not disappoint today. In fact, it was a five star day! We started off early so we could spend the whole day down in the Crater. The first sighting was a big bull elephant, followed by seeing 5 black rhinos, a pride of 7 lions, a lone male lion, many hippos including a hippo out if the water and three hippos that were 15' away from us at our lunch spot. Hyenas, baby jackals, and Grant and Thompson Gazelles, plus all the other animals we saw yesterday, but in even greater numbers.
The grass in the Crater is really green because of the recent rains, and the animals were everywhere. After we were almost cross-eyed from looking at all the animals, we headed up to the rim of the crater and went to a Maasai Village. The Massai are a tribe of 70 different clans, totaling almost 55,000 people. They inhabit the land around Ngorongoro and to the north into Kenya. They are trying hard to live in their traditional ways but still exist in a modern world. This was our opportunity to see first hand how they are doing it.
It was definitely a very full day. Now we are back at the lodge, just finished dinner and making our plans for tomorrow. We'll head south to Tarangire National Park for our final two days of safari. Still on the list of animals to see - a leopard.
Best regards,
RMI Guide Jeff Martin & Team
Wow! Sounds like a fabulous day on safari. It’s great to hear that all of the rain we witnessed has been so good for the Tanzanian flora and fauna.
35 hours after leaving the Dik Dik I arrived home, safe and sound with all of my luggage in tow. Dang the air is thick and heavy here at sea level! I think about you guys all the time and I can’t wait to see your animal photos.
Hugs,
Sarah
Hi All,
This is Geoff Schellens and Team down here in Mexico calling from the summit of Ixta! We had a wonderful climb a beautiful morning. Everything is absolutely as good as it gets. We are enjoying the sunrise right now. We are going to pack it up and head down shortly. We will give a call this evening.
Adios!
This is Zeb Blais checking in from the February Mexico Volcanoes climb. This morning we were greeted by the first rays of sun lighting Popocatepetl. We got a leisurely start to the day with a breakfast of huevos Mexicana. After breakfast we packed our gear and headed to the trailhead for our move to high camp on Ixta. The team did well and made it to high camp feeling good. After setting up tents, we spent the rest of the beautiful day relaxing in the sun. We wrapped up the day with a briefing on the climb ahead and a big dinner. Off to bed for now. We will check in from the summit. Adios.
RMI Guide Zeb Blais
Hi all... Just checking in on a rest day here at Chilcabamba. Been enjoying the views and the rustic setup of this farmhouse turned lodge and lazing about like monarchs. The famous dogs of Chilcabamba, Pacha and Toa are still around and friendly as ever (anyone who's been here knows what I'm talking about). These guys might be easier to adopt than the aforementioned monkey but I'm pretty sure the folks here won't give them up so easily. Not much else to report besides views, wood burning stoves, hundreds of hummingbirds, and ponchos! Enjoying our rest and letting our brains as bodies recoup after yesterday's challenge, getting ready for the next...
RMI Guides Billy, Garrett & Team
Hello -
We are back safely at high camp (19,600') on Aconcagua. We had a long day up and down and everyone needs some food and hot drinks to recover. The day started cold then turned hot and now it is back to cold with blowing snow. We need a break!
We will spend the night here and tomorrow begin heading down hill.
Hasta manana,
RMI Guide JJ Justman
Hello from the Plantation Lodge,
We had a great day today at Lake Manyara National Park. Located about two hours from Arusha, it is the first stop on our safari circuit. This is a hidden gem of a park as most people only drive right by it on the way to the bigger named parks. It is the perfect introduction to how to safari, getting us oriented to many of the different animal species and habitats, as well as figuring out how to get some really good pictures.
We had some excitement during our "bush" lunch when a troop of 60 baboons passed right by us, and three of the males caused quite a ruckus when they began fighting over one of the female baboons.
There were lots of elephants today, giraffes, monkeys, hippos, dik diks, warthogs, wildebeests, and ostriches. The list goes on and it was a very successful day.
We are now at the Plantation Lodge, a wonderful small lodge that sits on the highlands above the Great Rift Valley. It's absolutely beautiful here and they have thought of every detail in making this one of the best lodges in the area.
Tomorrow we are off to Ngorongoro Crater, where we will see what most consider as the eighth wonder of the world.
Best regards,
RMI Guide Jeff Martin
Hey everyone, I'm wondering if you could just take a listen to this for second... Do you hear that? I didn't think so because there is zero wind on the summit of Aconcagua right now! That is where Team Seven is at this moment. What do you say guys? [Happy yells from the climbers.] People are excited to be up here. We have a beautiful day climbing. We had a sunny day to begin with; now there's a little bit of clouds and a little bit of snow. People are feeling pretty darn good, tired but good. We had a great day climbing. Can't say enough great things about the summit. And now we are going to head down. This is JJ and the team heading downhill from the highest point in the western hemisphere of the world.
RMI Guide JJ Justman
RMI Guide JJ Justman calls in from the Aconcagua summit!
Hi Ken ! Congratulations on doing something I never even dream of. Your boys and wife are super proud. Can’t wait to see the photos and to hear the behind the scene stories. ok I am going back to the couch .... LOL. Take Ken. See you soon.
Posted by: Ivy on 2/19/2014 at 9:37 pm
Congratulations to you all! Great job Rich, we are all very proud of you. Safe trip down! See you soon! Hope you got some great pics for us…
Love
Susie
Today was another busy day for us starting with a duffle shuffle and reloading the van. After an hour drive we arrived to the best breakfast in Mexico, Mission Tlaxcala, a beautiful stone hotel over looking a stunning waterfall. With full bellies we hopped back in our van and drove through the warm morning to Amecameca. A quick grocery shop for last minute food items and the conclusion to Mike's quest for AA batteries put us back on the road. A beautiful two-hour drive winding through a wooded hillside and eventually the high grass covered slopes of Ixtaccihuatl (Ixta). Our home for the evening is the Altzimoni Hut at around 12,800'. After settling in to our new accommodations, we went for a short stroll up the trail to stretch the legs. Once back at our hut we discussed gear and packing for tomorrow and ate a five-star taco dinner. Now we are all doing a little packing and organizing our gear for mañana and turning in for a good night's sleep.
Thanks for following along with us,
RMI Guide Geoff Schellens
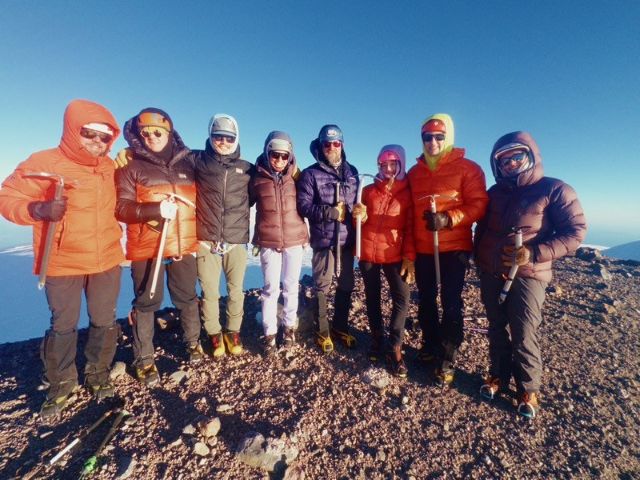
All smiles on the summit of Cayambe!
Our strong team made short work of Cayambe today and were on the summit in about 6 hours and 45 minutes after leaving the refugio. Conditions were very firm on the glacier and when combined with fair weather and almost no wind it made for a quick trip up. A rope length of steep snow and ice just below the summit required some front pointing and a belay especially because the runout emptied into a giant chasm of a bergschrund. A little ice climbing is always nice to keep you on your toes. The sun came up at some point while we were negotiating this steep pitch and we enjoyed the dawn from the summit. We took pictures and exchanged high fives on top and after a short while began our descent because we wanted to pass over several hollow spots on the glacier before the day heated up. Those firm glacier conditions that made the climbing so nice on the way up made the descent a fair bit more taxing. Despite being tired and a bit worked we were back at the refugio just after 10:30 am. A quick pickup and we were headed down the road to meet Victor and jump on the bus for the long ride to the Chilcabamba eco lodge at the base of Cotopaxi. And after a time warp of a bus ride, here we are chilling and filling up on a hot meal with a rest day ahead.
Time for sleep...
RMI Guide Billy Nugent & Team
Hello from the Dik Dik,
Our mountain adventure ended today with 10 very happy climbers. Even though we had a very long day yesterday, the team wanted to get an early start and hike down to the Mweka Gate. You could tell that everyone wanted showers as we made record time descending the 4,400' to the end of the trail. You can feel it is the last day as porters are ready to get paid, and the climbers are still on the high of summiting yesterday. We had a big lunch spread waiting for us at the gate and then we tipped out our mountain crew for all their hard work over the last seven days.
Now we are back at the hotel and sitting down for drinks before our celebration dinner. We are all cleaned up and have packed away all our mountain gear.
Tomorrow we are heading out on our safari. The perfect way to recover from the physical effort expended to reach the top of Kilimanjaro. First stop is Lake Manyara!
Best regards,
RMI Guide Jeff Martin


Wow! Sounds like a fabulous day on safari. It’s great to hear that all of the rain we witnessed has been so good for the Tanzanian flora and fauna.
35 hours after leaving the Dik Dik I arrived home, safe and sound with all of my luggage in tow. Dang the air is thick and heavy here at sea level! I think about you guys all the time and I can’t wait to see your animal photos.
Hugs,
Sarah
Posted by: Sarah on 2/19/2014 at 10:17 pm
View All Comments