Most Popular Entries
Fit to Climb: Week 12 Schedule
|
DAY |
WORKOUT |
TOTAL TIME |
DIFFICULTY |
|
1 |
Rainier Dozen / Easy Hiking ( 30 min) |
42 min. |
Medium |
|
2 |
1-2-3 Stair Workout x 5 |
90 min. |
Very Hard |
|
3 |
Rainier Dozen / Rest |
12 min. |
Recovery |
|
4 |
Rainier Dozen / Fartlek Training Hike (2 hrs) |
120 min. |
Very Hard |
|
5 |
Rainier Dozen / Rest |
12 min. |
Recovery |
|
6 |
Rainier Dozen / Hike (3 hrs) |
192 min. |
Medium |
|
7 |
Rainier Dozen / Hike (7 hrs, 15 pounds of pack weight) |
432 min. |
Medium |
|
Total |
15 hrs. |
|
BRIEFING
At this point in the 16 week training program, you are all in and the end is not far off! This week adds a second hike to your weekend, the Day 2 stair session becomes a little more challenging, and you’ll be adding a new kind of workout in for a bit of variety: a fartlek hike on Day 4.
DESCRIPTIONS OF WORKOUTS
Day 1:
Rainier Dozen + Easy Hiking (30 Minutes)
Today’s hike is a recovery workout and you can always substitute it with a different activity, such as running, biking or swimming. The important thing is to move at a moderate pace for 30 to 45 minutes. The pace can be conversational and you do not need to be dripping with sweat at the end of the workout.
Day 2:
Stair Interval Training: The 1-2-3 Workout
Warm up with some moderate paced stair climbing. Then, make three efforts: one moderately hard, one very hard, and one close to maximal effort, with rest periods in between. This may look like:
• 2 minutes at 50-65% intensity, followed by 3 minutes of rest (1 minute standing, 2 minutes descending)
• 2 minutes at 65-80% intensity, followed by 3 minutes of rest
• 2 minutes at 85-90% intensity, followed by 3 minutes of rest
Repeat this sequence five times.
Day 3: Rainier Dozen / Rest
Begin your day with the Rainier Dozen. Feel free to take another 30 to 60 minutes of light exercise if you feel like it (a brisk walk is a great option). If you feel tired, today is a good opportunity be good to take a complete rest day instead. Listen to your body.
Day 4: Rainier Dozen / Fartlek Training Hike (2 hrs)
‘Fartlek’ training is another version of interval training. The word originated in Sweden and means ‘Speed Play’. Fartlek training is popular with cyclists, runners and cross-country skiers. During your workout, you simply chose random ‘targets‘ like the top of a hill, a loop of a track, a tree or trail marker and then get after it with gusto! Increase your effort level as much as you feel like and mix up the length of the intervals for variety. I like this type of training because it replicates the unpredictable nature of mountain terrain: you can never be certain of the terrain or length of challenging portions of the climb. It’s fun too; it helps to pass the time while training alone, or adds a competitive challenge with friends. If you lack stairs, you can use any uphill grade and no matter the terrain, you can always increase intensity by adding weight to your pack.
Warm up with the Rainier Dozen, and then hike for two hours. Depending on how you are feeling, pick a spot on the trail that feels an appropriate distance away, and sprint to it. Alternate these high speed sections with walking at your regular pace. If you are doing the workout with friends, you can take turns picking the target.
Day 5: Rainier Dozen / Rest
Begin your day with the Rainier Dozen. Feel free to take another 30 to 60 minutes of light exercise if you feel like it (a brisk walk is a great option). If you feel tired, today is a good opportunity be good to take a complete rest day instead. Listen to your body.
Day 6: Rainier Dozen / 3 Hour Hike
The back-to-back hikes this weekend mimic the actual Mount Rainier climb where you complete two days of climbing in a row. The conditioning benefit is to get used to doing these long practice sessions close together. By this point, you’re getting so used to hiking so that this won’t seem like a significant challenge as it would be before the program.
Warm up with the Rainier Dozen and then hike for 3 hours. You may choose to include some pack weight if you’re looking for a little extra challenge.
Day 7: 7 Hour Hike (15 pounds of weight)
Warm up with the Rainier Dozen, and then hike for 7 hours, or about 12 - 14 miles. Be sure to hike at an even pace and bring all of the clothing, food, and equipment you need to be on the trail all day.
SUMMARY
This week is capped off with your first back-to-back hike. You may be tired when you start the second hike, or even have some muscle fatigue, but try and persevere. There are great benefits to be gained from introducing your body to the stress of multiple days of extended effort as it prepares you for the same challenges of climbing. We are headed into the final push of preparation over the coming weeks with several of these back-to-back days. When the climb comes you’ll know what to expect and how to take care of yourself over several days of climbing!
- John Colver
Have a question? See the
Fit To Climb FAQ for explanations of specific exercises and general pointers to help you through the Fit To Climb Program.
John Colver is a longtime climber, former mountain guide, and certified personal trainer with the American Council of Exercise. Colver introduced outdoor fitness classes to athletic clubs throughout the greater Puget Sound region before creating his
adventX brand. Currently, adventX leads training programs in Seattle and Colver presents clinics on outdoor fitness at companies such as Microsoft, Boeing, the American Lung Association, and REI. Colver lives in Seattle, and is working on his second book,
Fit to Climb - a 16 week Mount Rainier Fitness Program.
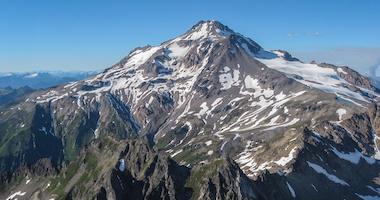
It was another breathless, warm morning on the Ecuadorian countryside. Our beautiful hacienda was situated perfectly in a giant valley which runs directly from our dining room window unabated for 7000’ vertical feet straight to the summit.
Chimborazo, the farthest point from the center of the earth and closest to the sun, was mostly displaying her majesty as we sipped coffee and ate our eggs. As the morning wore on, she hid herself from view and we loaded the magic bus ready to take us to the Chimborazo trailhead. By 1:30 all our packs were packed, and it was off to high camp at 17,500 feet.
At this altitude nothing feels perfect, unzipping your trousers just to take a pee can leave you winded. But our seemingly invincible team has again handled things with grace under pressure and is doing well up here. Once again, the Ecuadorians have done it right, providing a giant dome tent for our lounging pleasure.
But don’t get too comfy bloglandia, the alarm is set for a mere four hour from not. It is then we will have our final test?
The is rest well with a positive psych ! Wish us well!
RMI Guides Adam Knoff, Hannah Smith and Team

Every summer, RMI climbing teams consume over 7,000 gallons of drinking water at Camp Muir, the primary camp on
Mt. Rainier's Disappointment Cleaver Route. For many years, melting snow in a large barrel heated by propane created drinking water for Camp Muir. We knew that there was a better way to provide drinking water to our teams and it just required a little bit of creativity, brainstorming, and initiative. Over the course of the 2012 and 2013 climbing seasons, a new solar thermal system was installed at Camp Muir. This system, designed to use environmentally benign and free solar energy to efficiently melt snow, provides drinking and cooking water for RMI climbers and guides at an elevation of 10,060'. The system was designed and built by RMI Guide and alternative energy professor
Mike Uchal and his colleague Dr. Brian Raichle, who is a professor of solar energy technology at Appalachian State University. RMI Guide Cody Doolan also contributed with the design, installation, and maintenance. RMI's Solar Snow Melt System, part of our commitment to
Responsible Climbing, reduces our environmental footprint on Mt. Rainier by minimizing the need to burn liquid propane gas in order to melt snow, cuts our operating costs, and reduces the environmental footprint of the helicopter used to transport propane to Camp Muir.
 How it works:
A small electric pump powered by photovoltaic panels pulls water from the burn barrel, a large barrel used to melt snow, uphill to a solar thermal collector. The collector, a conventional flat plate solar thermal collector is the kind that is typically used in residential and commercial domestic hot water systems. The water is pulled by gravity through the copper pipes in the collector and is heated by solar radiation before returning to the melt barrel. RMI guides keep the barrel fed with clean snow from the snowfields above Camp Muir and this snow mixes with the warm water and melts into liquid form. A controller turns on the pump in the morning and off at the end of the day when the sun goes down. Because the collector is uphill of the barrel, gravity drains water from the collector at night to prevent damage from freezing water. This system design eliminates any problems associated with overheating during late season conditions when solar energy can be plentiful and strong.
 How it performs:
On warm, sunny days at Camp Muir, typical in the late summer, the solar snow melting system heated the 30+ gallons of water in the burn barrel to above 100°F. That is nearly spa temperature! On cold, sunny days, often found early in the season, the system heated water to temperatures above 40°F - enough to effectively melt snow. Propane is still used during storms that last several days, when solar radiation isn’t strong enough to heat the collector, but the solar snow melting system dramatically reduced the amount of propane burned during the 2013 summer climbing season.


Anecdotally, before the 2013 climbing season the propane burner was running for around 3.5 hours per day to melt enough snow to provide drinking water for the RMI teams. During the 2013 climbing season, guides estimate that the burner was needed on average around 15 minutes per day. During the summer climbing season of 2013, we estimate the solar system saved approximately 250 pounds of propane, the associated cost of transport that propane, and 0.33 metric tons of CO2 emissions.
This project is part of
RMI’s commitment to the outdoor community and environment as we work to reduce the environmental footprint of our climbs in order to ensure that many future generations are able to enjoy the same mountain environment that we enjoy. The RMI Solar Snow Melt System is a great example of practices that can reduce a business' environmental footprint and provide cost savings at the same time. By the end of its first full year at Camp Muir, the system paid for itself with savings in fuel and helicopter transport costs. The next time you make it to Camp Muir, swing by the guide shack and check it out! The guides would love to show you the system in person.
_________
Mike Uchal is a Professor of Alternative Energy at Appalachian State University and guides trips on Mt. Rainier and
Mt. McKinley for RMI Expeditions. Mike lives the mountain life, rock climbing, paddling whitewater, mountain biking, trail running, and skiing whenever he has spare time.
Hello again everyone,
All is still well here in the Khumbu as the team members made our way back to Pheriche. It was a busy day on the trail with climbers, Trekkers, yaks, and porters all bound uphill to basecamp. We slowly made our way through the maze of traffic and enjoyed a few last good views of Everest.
Pretty amazing how thick the air here at 14,000' feels compared to 17,500'. Spirits are high even with slightly tired legs after an eight hour day!
RMI Guide Casey Grom and crew

Hi. This is Bill blogging from Namche, Nepal.
I started climbing with my daughter Sara about 3 1/2 years ago when she was just 12, and since that time we have had many adventures together. I love climbing, but even more so, I love spending the time with Sara, who is now 16. When we are at home in Atlanta she is so busy and I never get to hear about all the things that go on in her life every day. So while we are climbing, and over meals, or watching a movie or TV show on her itouch, I get to hear all the funny things that happen on a daily basis. For example, I just learned all about the social importance of 'threads" on Facebook, and the song with the line "the best 30 seconds of my life" (if you don't know what song that is, that's probably a good thing!).
So this past week has been fun. It takes a lot of patience to fly from the states to Kathmandu, with the layovers, cramped planes, visa lines and time changes, so its a big relief to finally get to a hotel room and start to work on your jet lag. Its been about a week, and I think I am finally over the 10 hour change.
The flight from Kathmandu to Lukla is quite an adventure, which starts with getting up in Kathmandu at 4:30 am and then literally fighting your way through a mosh pit of folks in the airport. It's actually great fun if you keep it in perspective. And of course, the 45 minute flight up to the mountains through a saddle into the very short landing strip (on a twin prop, specialized short takeoff and landing plane) is intense. If you have any doubt, go to youtube and search "lukla airport" and check out the clips. The strip is only open for brief spurts every morning due to the clouds, so you have to be on the 1st flight, hence the mosh pit.
There are two ways to get to Lukla, flying or walking, and the walk takes days. So, the main way (really the only way) is to fly in. All goods used by the many villages in the mountains get flown in. Then, once into Lukla, porters pick up all the goods and carry them up the trail. The trail is filled with porters carrying 70 to 80 pound loads on their backs, some the size of refrigerators. Most everything gets to the towns in the mountains makes it way there on the backs of the porters (or yaks or donkeys). All of our bags going to base camp are carried by these porters, and it takes them about 7 to 10 days to get up to basecamp. The porters climb from an altitude of about 9,000 feet, down to about 8,000 feet, and then all the way up to nearly 18,000 feet. Its just amazing what they do.
The "tea houses" that we stay in are really beautiful little lodges. They are made of stone (cut up here from the sides of the hills). The rooms are simple but clean, and the common dining room serves delicious food. We are eating so very well, and with dishes that we are accustomed to - pizza, chicken, steak, french fries, eggs, pancakes, etc... and these dishes - combined with the RMI condiments - have been great. We are buying bottled water along the way, but the bottles are getting more and more expensive the further we go.
Our climb so far has really consisted of getting into Namche, the center for all trekking and climbing in this area. The "Namche hill" is a 2000 foot hill from about 9,000' to 11,000' just before Namche that takes about 2 hours to climb. It was raining yesterday when we were ascending, so our biggest challenge was dodging the puddles and the yak dung along the way (not to mention the yaks which also have considerable loads on their backs).
This morning we awoke early to climb above Namche to get our first vies of Everest, Lhotse and the other massive mountains in the surrounding area. After a half hour trek at 6:30 this morning we were rewarded with perfect views. Everest had its tell tale plume of clouds streaking off the summit as it pierced the jet stream. It looks quite daunting, perhaps because it is.
Our trip is led by Dave Hahn, who is not only an insane climber, but one of the most down to earth people you will ever meet. He breaks it all down to seem so simple, and he makes me (and Sara) believe that all we have to do is take this adventure day by day, and climb by climb. This coming from a man who has summitted Everest 12 times, more than any non-sherpa in the world. If I were him I would be at least a little boastful, but he never is. And he seems to know everyone along the trail, at the hotels, and in the shops. Its one big mixer for Dave as we head to base camp!
So today is a rest day, and quite a beautiful one. Sara and I are going to break out Yatzee and the deck of cards. The goal today is to continue to have our bodies adjust to 11,000 feet while remaining strong and sickness free. Rest days are my strongest days in the mountains!!!
Thanks for following our climb.
Bill McGahan
(Photos by Expedition Leader Dave Hahn)
We've come to the inescapable conclusion that Everest summit for 2015 is out of reach for our team. Besides the rather obvious and glaring philosophical difficulties of pursuing a recreational venture in the midst of a national -and local- disaster, there are the on-the-ground mountaineering realities that will not permit us to look upward again. We have no viable route through the Khumbu Icefall and the Earth is still shaking. We couldn't think of asking anyone to put themselves at the risk required for re establishing that route under such circumstances. The effort at this advanced stage of the season would normally be focused on building a route to Camp 4 rather than to Camp 1, nobody will be able to say when the aftershocks will end, but it will -without a doubt- be too late for fixing the upper mountain and stocking camps before the normal advance of the monsoon.
We'll put our efforts into an organized and safe retreat from the mountain. Nobody harbors illusions that travel in this stricken and damaged country will be simple, but we'll head for home now in any case.
Best Regards,
RMI Guide Dave Hahn
Rest and recovery is an important part of the training process and there are many techniques, both active and passive, that can help. Recovery from your training efforts can be looked at from physiological and psychological perspectives. Here are some tips:
1. Plan Your Training: The first step in getting adequate recovery is crafting a
solid training plan allowing for phases of training to build progressively and allowing time for active rest.
2. Keep Track: Keeping a training log is a good way of reviewing your progress. I suggest recording not only the volume, intensity, and type of each workout completed, but also your own notes about how you felt in each workout. Self-monitoring how you feel mentally (strong, weak, interested, un-interested) will allow you to see how you are progressing in an overall sense.
3. Get Psychological Rest: Psychological strategies are important factors in reducing and managing stress. Relaxation, meditation, reading, visualization, and using a coach as a sounding board are all valuable tools in helping to maintain focus and a positive attitude throughout your training. Relaxation is also helpful in ensuring quality sleep, which is essential for recovery.
4. Take Social Time: Too much of a good thing can be bad for us. Taking a complete break from climbing and hiking to participate in alternative activities can be a good way to decompress. Mix your hard training up with a different sport; play soccer, frisbee - anything really. At RMI there is a penchant for beach volleyball, ping pong, and horseshoes - it’s a nice mental break from the mountain and those downtime matches are intense but a lot of fun.
5. Get Therapeutic Rest: Sports massage, some forms of yoga, hot baths, and hydro-massage are just some examples of the many techniques available to help relax muscles after training and prepare for subsequent training sessions.
6. Pay Attention to Nutrition: Proper nutrition is essential for complete recovery. Quality food that is rich in nutrients is a key requirement for re-supplying energy stores and maintaining our body, it’s muscles, bones, organs, and systems (see
Nutrition for Mountaineering Training for more information on nutrition).
Mountain climbing is tough on the mind and body - and so is training for it. When we climb we steal every opportunity to recover from the hard work so that we can get up the next day and do it again. Training demands the same attention to rest and recovery. This is a work-hard, rest-hard activity and often times your success will be as much dependent on how well you rest as how hard you train.
- John Colver
John Colver is a longtime climber, former mountain guide, and certified personal trainer with the American Council of Exercise. Colver introduced outdoor fitness classes to athletic clubs throughout the greater Puget Sound region before creating his
adventX brand. Currently, adventX leads training programs in Seattle and Colver presents clinics on outdoor fitness at companies such as Microsoft, Boeing, the American Lung Association, and REI. Colver lives in Seattle.
Questions? Comments? Leave a comment to share your thoughts with John and other readers!
The Expedition Skills Seminar - Muir led by RMI Guides Brent Okita, Billy Nugent and Linden Mallory reached the summit of Mt. Rainier today. The team was walking into the crater rim at 8:20 a.m. Winds are 20 mph and there is a cloud cap on the mountain this morning. The teams will return to Camp Muir and continue their training of expedition skills. They will descend from Camp Muir to Paradise on Friday and conclude the program at Rainier BaseCamp.
Congratulations to today's climbing teams! Enjoy the rest of your time on the mountain.
On Friday the Camp Muir Expedition Skills Seminar returned from five days of training on Mount Rainier. Aspiring climbers learned a variety of movement and technical skills that will further their future mountain experiences. This wraps up RMI trips on Rainier this season, thank you to everyone who has been following along!
RMI Guide Dustin Wittmier
The Five Day Climb August 30 - 3 September completed their program. The team met on Monday for their Orientation and Equipment check, then headed out the next day above Paradise for a full day of Mountaineering School. With their glacier travel training complete the team ascended 4.5 miles to Camp Muir on Tuesday. They spent two nights at Camp Muir and were able to explore the route up to 11,300', the group was unable to make a summit attempt due to route conditions. However, they did get in some crevasse rescue training. Today the group finished up a bit more training before packing up and descending to Paradise.
Congratulations team - we hope you enjoyed your time on the mountain!
Previous Page
Next Page


I am currently signed up for the Rainer hike this coming Summer. I have done Devils Path in Catskills, NY which is 25 miles, 10,000 ft of climbing in 12 hours as well as climb Mount Mitchell in NC which is about 8 miles and 4,500 feet of climbing which took about 2 hours. I obviously will have ample time between when the 16 week program ends and my hike. Is there any suggestions for me to continue to keep in shape between the end of my training program and my hike? I know I am in good shape for the hike through trying hikes like I mentioned above but wanted to know how I continue to stay on that level. Thanks!
Posted by: Stephen on 11/17/2015 at 5:49 am
I’ve been down since labor day. My inner thigh started cramping at the end of a hike, cramped through the night, then stiffened up. The following day the skin was very bruised like I had bumped it but I had not. It’s still sore. Before and during the hike I was hydrating with clear water and occasional electrolytes because I seem to have cramping issues, but I don’t remember sweating very much. It was a cool, dry, sunny day and I was often in a tee shirt. Maybe I was evaporating off more than I realized? Truthfully, I had cheated on the training a little. I thought I was ready for a fun 13,600’ spring climb of Mt Dade in the Sierra Nevada, spring snow fields, and an overnight pack. It was only a 4 mile 1000’ ft elevation approach to an 11,000’ base camp, which is where I started cramping and turned back from the next day. It was a bear descending. I’ve been doing nothing since as far as training, but I’m going to start up again. Any advice on recovery training, and preventing this kind of injury on the the next big hike?
Posted by: Robert on 6/8/2014 at 12:19 pm
View All Comments